
Find the problems in the shed, not in the field.
When conditions are right for drilling, the last thing you want is a machine that isn’t ready to work.
A failed sensor, worn coulter, damaged seed hose or electrical fault might seem like a relatively minor problem. But discover it halfway through the first field, and suddenly you’re losing valuable drilling time.
The good news is that many potential problems can be identified before the season starts.
Whether you’re running a Horsch, Väderstad, Amazone, Claydon, Kuhn or another make of seed drill, a thorough pre-season inspection can help you get ahead of faults, identify worn components and make sure the machine is ready when you need it.
Here are eight areas worth checking before your drill heads back into the field.
1. Start with the electronics and control systems
Modern seed drills are much more than mechanical machines. Sensors, electronic metering systems, control boxes and wiring all play an important part in how they operate.
Before drilling starts, power up the control system and check that everything responds as expected.
Depending on the drill, this could include:
- Control box operation and any warning messages
- Fan speed monitoring
- Metering motor operation
- Tramline controls and bout counting
- Hopper level sensors
- Seed flow monitoring
- ISOBUS communication and connections
Don’t assume that because the control box switches on, everything is working correctly.
Where possible, test the individual functions and check that the machine responds as expected.
Electrical problems can be particularly frustrating because the symptoms don’t always point directly to the cause. A faulty sensor, damaged wiring loom or poor connection can sometimes appear to be a mechanical or metering problem.
CentralAg tip: If your drill displayed an intermittent warning or fault towards the end of last season, investigate it now rather than hoping it has disappeared.
2. Inspect the seed metering system
Accurate seed metering is fundamental to successful crop establishment.
A drill might appear to be operating normally while delivering an inconsistent seed rate, so it’s worth checking the complete metering system rather than simply making sure it turns.
Inspect the metering rollers, wheels, housings and associated components for wear, damage or contamination.
Pay particular attention to:
- Worn or damaged metering components
- Free movement of shafts and drive mechanisms
- Seals, flaps and adjustment mechanisms
- Electrical metering motors and connections
- Build-up of dust, seed treatment or debris
On drills with mechanical drive systems, check chains, sprockets and other transmission components.
On electronically controlled machines, make sure the metering system operates correctly through the control unit.
Once the mechanical checks are complete, carry out a calibration test in accordance with the manufacturer’s instructions.
A properly functioning metering system helps ensure the seed rate you enter is the seed rate you’re actually delivering.
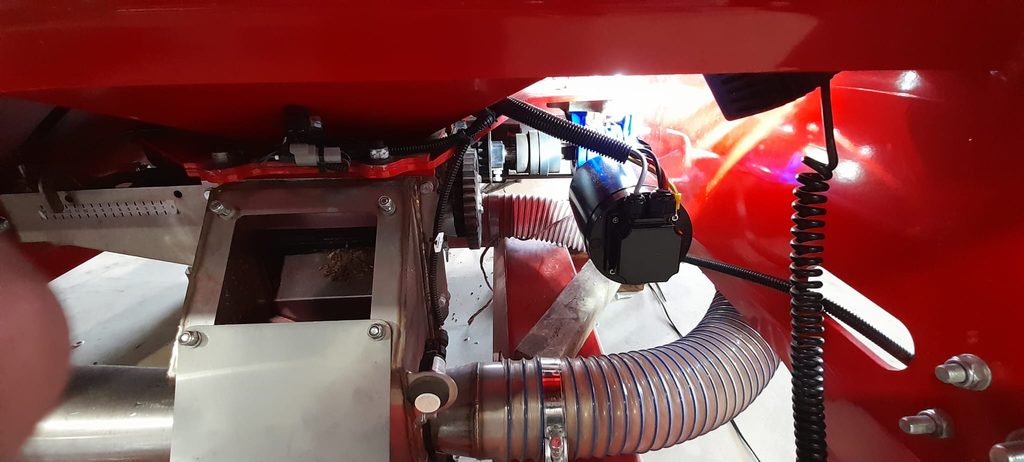
3. Check the fan and seed distribution system
On pneumatic seed drills, consistent airflow is essential for transporting seed from the metering system to the coulters.
A restriction or leak can affect seed distribution and potentially cause blockages.
Start by inspecting the fan and its drive system. Check hydraulic connections, hoses and any relevant oil levels in accordance with the manufacturer’s recommendations.
Then work through the seed distribution system.
Look for split hoses, loose connections, damaged distribution heads and areas where seed or debris could accumulate.
Seed hoses deserve particular attention. They can deteriorate with age, become damaged during operation or develop restrictions that aren’t immediately visible from outside.
Where the machine and manufacturer’s procedures permit, test the airflow and check for blockages throughout the system.
CentralAg tip: Don’t just inspect the obvious hoses. Check connections around the distribution head and where hoses enter the coulter assemblies.
4. Look closely at the coulters and wearing parts
The coulters are where all the work of seed metering and distribution finally becomes seed placement.
Even a perfectly functioning metering system can’t compensate for badly worn or damaged coulters.
Inspect the complete coulter assembly, looking for uneven wear, damaged components, loose fixings and excessive movement.
Depending on the type of drill, important checks may include:
- Disc or tine wear
- Coulter alignment
- Bearings and pivot points
- Press wheels and depth-control components
- Scrapers and anti-blocking components
- Springs, bushes and mounting assemblies
Look across the full working width of the machine rather than checking only a handful of rows.
Uneven wear can reveal underlying issues with alignment, adjustment or individual components.
The objective is consistent seed placement across the entire drill.
5. Inspect hydraulics and moving components
Hydraulic systems are responsible for a wide range of functions on modern seed drills, from folding and lifting to fan operation and coulter pressure.
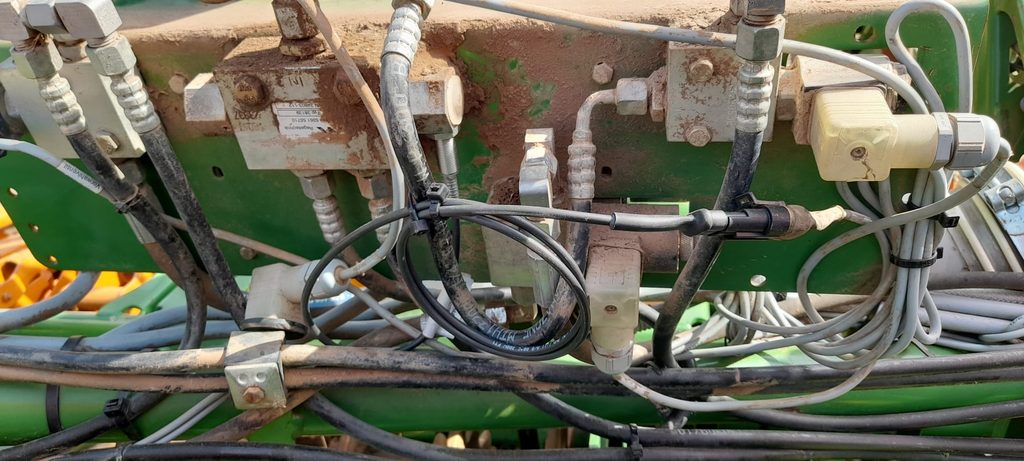
Inspect accessible hoses, fittings, rams and connections for signs of wear, damage or leakage.
Pay particular attention to hoses around folding mechanisms and pivot points, where repeated movement can create wear.
Check moving assemblies for excessive play, damaged bushes and loose fixings.
Bearings on packers, wheels and cultivation components should also be inspected for wear or rough operation.
Follow the manufacturer’s safe isolation procedures before working around hydraulic or folding systems. Never investigate suspected high-pressure hydraulic leaks with your hands.
Finding a developing hydraulic or bearing problem in the workshop is considerably easier than dealing with a failure during a busy drilling period.
6. Don’t forget the hopper
The seed hopper is easy to overlook, particularly if the drill was cleaned before being put away.
However, storage can create its own problems.
Inspect the hopper for debris, corrosion, damaged seals and evidence of rodents.
Check internal components, inspection covers and connections for damage or missing parts.
Make sure the hopper is clean and dry, and that any moving components operate freely.
If the drill has separate hoppers or additional metering systems for fertiliser or small seeds, inspect those as well.
A problem inside the hopper can affect the metering system before the seed has even entered the distribution pipes.
7. Check the chassis, running gear and safety equipment
It’s tempting to concentrate entirely on the drilling components, but the rest of the machine deserves attention too.
Inspect the frame, headstock, folding assemblies and major mounting points for signs of cracking, damage or excessive wear.
Check wheel bearings, tyres, wheel fixings and braking systems where fitted.
Road lights, reflectors and other required safety equipment should be working correctly.
For PTO-driven equipment, inspect the shaft and guards in accordance with the manufacturer’s instructions.
A drill that’s mechanically ready to establish a crop still needs to be safe to transport and operate.
8. Carry out a complete functional test
Once you’ve completed the visual and mechanical inspections, it’s time to check the machine as a complete system.
Where safe and permitted by the manufacturer, operate the drill’s functions and check that the mechanical, hydraulic and electronic systems work together correctly.
This might include:
- Running the fan and checking its monitoring system
- Testing the metering system
- Checking tramlining functions
- Operating folding and lifting mechanisms
- Confirming sensor readings and warning systems
- Performing seed calibration
This final stage matters because individual components can appear perfectly serviceable while the machine still has an underlying problem.
A sensor may work intermittently. A metering motor may respond incorrectly. A hydraulic function may behave differently under load.
Testing the complete machine gives you a better opportunity to identify those issues before drilling begins.
What if you find something wrong?
Not every issue means a major repair, and not every worn component needs immediate replacement.
The important thing is understanding what needs attention before drilling and what can reasonably wait.
A pre-season inspection gives you an opportunity to prioritise the work, order parts and plan repairs without the pressure of a drilling window.
It’s also worth considering whether an existing machine could benefit from improvements while it’s being worked on.
An ageing electrical component, unreliable control system or additional seeding requirement might present an opportunity for a worthwhile upgrade.
When you’re ready to drill, your drill should be ready too.
At CentralAg, we specialise in independent seed drill inspections, planned maintenance, electrical diagnostics, upgrades and major repairs.
We look at the complete machine — from wearing parts and metering equipment through to sensors, wiring, hydraulics and control systems.
Our aim is straightforward: help you understand the condition of your drill, identify what needs attention and keep a good machine working for you.
Don’t wait until you’re halfway through the first field to discover a problem.
Book a Pre-Drilling Inspection with CentralAg.
CentralAg provides planned specialist seed drill support across the Midlands and surrounding areas. Always follow the manufacturer’s operating, maintenance and safety instructions for your particular machine.